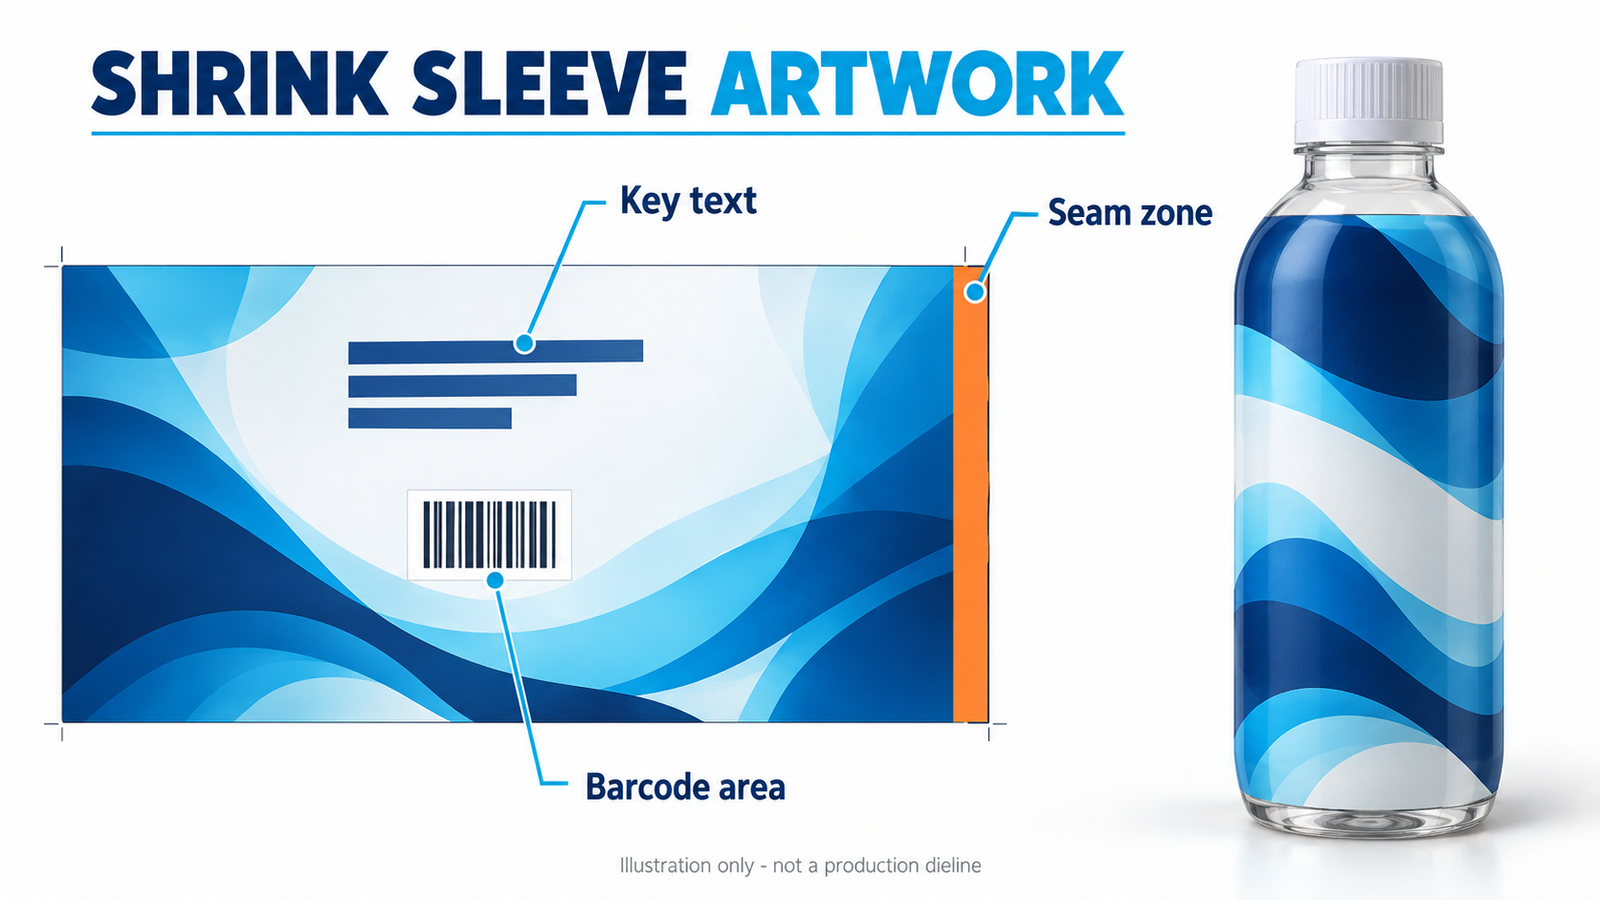
A shrink sleeve design has to work on a container, not just on a flat screen. Before approving artwork for custom printing, agree where the seam, barcode, key text and finished sleeve edges will sit. This practical checklist helps buyers and designers prepare a clear handover to their sleeve supplier.
1. Start with the confirmed container and dieline
Send the actual container drawing or physical sample, together with the intended coverage. Identify the front display panel and where the sleeve should stop at the shoulder and base. A photograph is useful for discussion, but it is not a substitute for confirmed measurements.
Ask for the supplier-approved dieline before final layout. Do not scale another bottle’s label to fit, or calculate the printable width from bottle diameter alone. The supplier needs to confirm the sleeve dimensions, seam area and production allowances for the specific project.
2. Agree the seam position before placing important graphics
Mark the seam on the artwork review copy and agree its position relative to the front panel. Keep critical text and machine-readable codes away from the seam and its agreed clearance zone. A continuous background pattern may need a deliberate transition at the join rather than an assumed perfect match.
Use the clearance and bleed dimensions supplied for your job. There is no single seam allowance in this checklist that can safely be applied to every film, sleeve size and converting process.
3. Treat barcode placement as a finished-pack check
Keep the required quiet zones clear and protect contrast, symbol dimensions and height. The correct position depends on the barcode type and package shape; folds, wrinkles and obstructed scanning surfaces can cause problems. See GS1’s barcode quality checklist.
Have the converter review the proposed barcode location before printing. Check representative finished packs using the applicable customer or GS1 verification method, rather than relying only on a screen image or a successful phone scan. Do not assume one barcode orientation is right for every container.
4. Review text on the shaped container
Give extra attention to logos, small text and circular graphics near shoulders, tapers and changes in shape. Ask whether artwork compensation and a physical trial are required. The final decision should use the intended container, film and application process, not an arbitrary distortion percentage.
Keep mandatory product information legible and have the brand owner approve its wording and market-specific requirements. The printer’s artwork review does not replace the brand owner’s regulatory review.
5. Prepare one controlled artwork package
- A clearly named artwork revision and a PDF showing the intended appearance.
- Editable artwork in the file format agreed with the printer, with fonts and linked images handled as requested.
- The confirmed dieline on a clearly identified layer, separate from printable artwork.
- Notes identifying transparent areas, white ink requirements and agreed colour references.
- The correct barcode data, SKU name, language version and quantity for each design.
- A list of open questions; do not leave conflicting versions marked “final”.
6. Separate artwork approval from production approval
A PDF approval confirms the agreed content and layout; it does not by itself prove fit, finished colour or performance on a packaging line. Record what the proof represents and what still needs a physical trial. If a container, film or artwork revision changes after approval, ask which checks need to be repeated.
For visible fit problems during a trial, use our shrink sleeve wrinkles and misalignment checklist. Keep fault investigation separate from signing off a new artwork version.
Ready to discuss your sleeve artwork?
Haosen Packaging manufactures custom printed shrink sleeve labels. Send your container photo or drawing, artwork, quantity by design and delivery destination through our packaging enquiry form. Tell us whether you need printed sleeves only or have application requirements to discuss; bottle sleeving services should not be assumed to be included.
Explore our custom shrink sleeve labels for your next packaging project.